I've wanted to make this ever since buying my bread maker!
The recipe calls for
High gluten (bread) flour 170g
Low gluten (cake) flour 30g
Butter 30g
Sugar 25.5g
Milk powder 6g
Salt 3.8g
Mixture of one egg, one egg yolk, and water 140g
Dry instant yeast 2.1g
Frozen butter 40g
40g of butter has to be prepared ahead of time by freezing (at least overnight, as suggested by the recipe). They also need to be cut into 1cm cubes. These are to be added to the dough midcycle.
Anyhow, I followed the recipe as is. The egg and water mixture only came up to be about 100ml, because I actually had a little "hiccup" with the measurement. I had already cracked the eggs into the measuring cup before placing it onto my electronic scale. So technically speaking, I should have added more water to compensate for the weight of the empty measuring cup. But I decided I was too lazy to start all over and do the calculations. Plus my dough was always coming up wet, so I decided that less water wouldn't hurt.
Once again, I felt the urge to check the dough after the machine has been set in motion. For the brioche, mode No. 9 is used. No timer available for this option, because fresh ingredients such as eggs and milk might spoil if left in the breadmaker for extended periods of time.
And what do you know!! The consistency of the dough was perfect! So if I had followed the recipe EXACTLY, I would have ended up with too much water again! And here I am adding in the frozen chunks of unsalted butter.
Three and a half hours later:
Oh!!! This is by far the best loaf I've gotten out of the machine! Finally a loaf I can be proud of =) Needless to say everyone at home loved it. What a success!
I'm not a gourmet, not a foodie, not a cook. I just enjoy eating good food with good company.
Thursday, June 13, 2013
Monday, June 3, 2013
Raisin bread
Now that I *think* I'm getting the hang of bread making with my Panasonic...
Let's play with some of the extra features!
Sticking with the extra soft loaf mode (No.2), I've decided to throw in some raisins. And learning from my previous mistakes, I've decreased the water from 190ml to 170ml.
Let's play with some of the extra features!
Sticking with the extra soft loaf mode (No.2), I've decided to throw in some raisins. And learning from my previous mistakes, I've decreased the water from 190ml to 170ml.
I placed 100g of raisins in the top dispenser.
Once again, I took a peek to make sure the consistency of the dough was correct. 170ml of water was still too much!! In went another extra 1/4 cup of flour. Next time I will try only 160ml of water. Humid, humid weather!!
Timer on. 8am next morning...
Hey, not bad at all! It probably could have used less water or just a tad more flour, because the bread appears more dense on the bottom. But all in all, very happy with the result. The manual says that with added fruit/nuts, the rise of the bread can be affected. I wonder if more yeast will help? This loaf does seem more dense than a plain loaf. I think next time I will add just a tad more yeast, and I will change the 烤色 (crust?) option from standard to light.
Special thanks to my family who finished the entire loaf that same morning!! I feel so accomplished.
Cannot wait to make another loaf!
超軟吐司 Finally!
Seriously. I spent hours pondering why my bread making has been less than successful.
Then!! After hours of searching online. A revelation!! Bless the person who finally wrote, "don't be afraid to take a peek while the machine is operating"!!!!
Yeah! Why didn't I think of that?? The operating manual doesn't say I'm not allowed to lift up the lid to take a look! And what's the worst that can happen? Just another failed loaf of bread.
Wait...I could have broken the machine! Hahaha...okay, I didn't think of that. But I figure if lifting the lid while it is operating will break the entire unit, the manufacturer will probably have huge warning signs plastered all over the machine.
Then!! After hours of searching online. A revelation!! Bless the person who finally wrote, "don't be afraid to take a peek while the machine is operating"!!!!
Yeah! Why didn't I think of that?? The operating manual doesn't say I'm not allowed to lift up the lid to take a look! And what's the worst that can happen? Just another failed loaf of bread.
Wait...I could have broken the machine! Hahaha...okay, I didn't think of that. But I figure if lifting the lid while it is operating will break the entire unit, the manufacturer will probably have huge warning signs plastered all over the machine.
Wow! Look! As it turned out my dough did in fact appear to be WAY too wet. This is what the dough looked like AFTER I added an extra 1/3 of a cup of flour!
By the way, I'm making the extra soft loaf again. The recipe calls for 250g of flour and 190ml (-10ml for hot weather) of water.
Look at it go!!!
I did not use the timer option. I wanted to see the whole thing through!
And voila! FINALLY!! Waiting up until 1am was definitely worth it! Just looking at this makes me happy =)
Cutting into the bread the next morning. YUM.
Panasonic SD-BMS105T: Attempt No. 3
Soft Loaf
This time I'm making the soft loaf, mode 3 on machine
High gluten flour 250g
Butter 15g
Sugar 17g
Milk powder 6g
Salt 5g
Water 180ml
Dry yeast 2.8g
Once again, I used the automatic timer option, wanting to wake up to a fresh loaf.
Why?? Why?? Why is the top sunken AGAIN?? Okay, okay, too much water or too little flour, right? But that's what the recipe told me! I followed it EXACTLY. So is there something wrong with my scale? Is my yeast dead? Is there something wrong with the flour I am using?
Yeast can't be dead because I had just bought it. Okay, to be sure I will test it before making more bread.
As for the flour I am using..well, I bought it at Costco. I am sure it's high gluten (bread) flour. I have googled it and other people have used it to make successful bread.
Something wrong with my scale? Okay, I will also TEST that the next time. But really, if all these things are faulty I am never shopping at that specialty store again! (That is how hard it is to find baking-related items in Taiwan, you actually need to go to a specialty store).
On a happier note, see in the background of this photo? Yes, in the Glasslock container is the strawberry jam I made with the breadmaker! Okay, I know I could have just made jam the conventional way but jam making is like a big deal with this model of bread machine!! It's as if I paid extra so my bread machine can ALSO make jam! Obviously I have to try it.
Instead of using fresh strawberries as suggested in the instruction booklet, I used frozen (organic strawberries, once again purchased from Costco).
Frozen strawberries 400g
Sugar 140g
Lemon juice 2.5 tablespoon
I set the machine on MODE 26. Cooking time was set to 150 minutes instead of the default 120 minutes.
It's not bad, the jam. I think the advantage is that it saves you the effort of stirring the jam yourself. But 150 minutes for making jam?? I think that's A LONG TIME for making jam. I don't think I need to be stirring for 150 minutes if I were making this on a stove...maybe I'm mistaken. Any jam experts out there?
Panasonic SD-BMS105T: Second Attempt
A few days after my first attempt at bread making...
Couldn't wait to make my second loaf!!
This time I followed the recipe for "Extra Soft Loaf" (Mode 2). The recipe calls for
High gluten flour 250g
Butter 15g
Sugar 17g
Milk powder 6g
Salt 5
Water 190ml (Chilled, decrease by 10ml if room temperature over 25)
Dry yeast 1.4g
To be honest, I was really concerned with the amount of dry yeast that was to be added. 1.4g only? Really?
Well, the operating manual is my only guide, so in goes all the ingredients, as stated in the recipe. As usual, I decreased the amount of water to 180ml.
Set the timer for 8:30am the next morning...
What??? What happened?!?! My bread didn't rise at all!!
Oh, what a shame...This was not at all edible. Such a disappointment.
Couldn't wait to make my second loaf!!
This time I followed the recipe for "Extra Soft Loaf" (Mode 2). The recipe calls for
High gluten flour 250g
Butter 15g
Sugar 17g
Milk powder 6g
Salt 5
Water 190ml (Chilled, decrease by 10ml if room temperature over 25)
Dry yeast 1.4g
To be honest, I was really concerned with the amount of dry yeast that was to be added. 1.4g only? Really?
Well, the operating manual is my only guide, so in goes all the ingredients, as stated in the recipe. As usual, I decreased the amount of water to 180ml.
Set the timer for 8:30am the next morning...
What??? What happened?!?! My bread didn't rise at all!!
The yeast didn't fall in completely!
In retrospect I think this is because I had just used the machine to make jam (strawberry jam! photos in next post), and there was some steam and moisture on the top lid of the unit, as well as in the yeast dispenser. I tried to wipe down the dispenser with a moist cloth, but maybe I didn't give it enough time to dry completely. As a result, the yeast clung to the walls and didn't fall in completely.
Oh, what a shame...This was not at all edible. Such a disappointment.
Monday, May 27, 2013
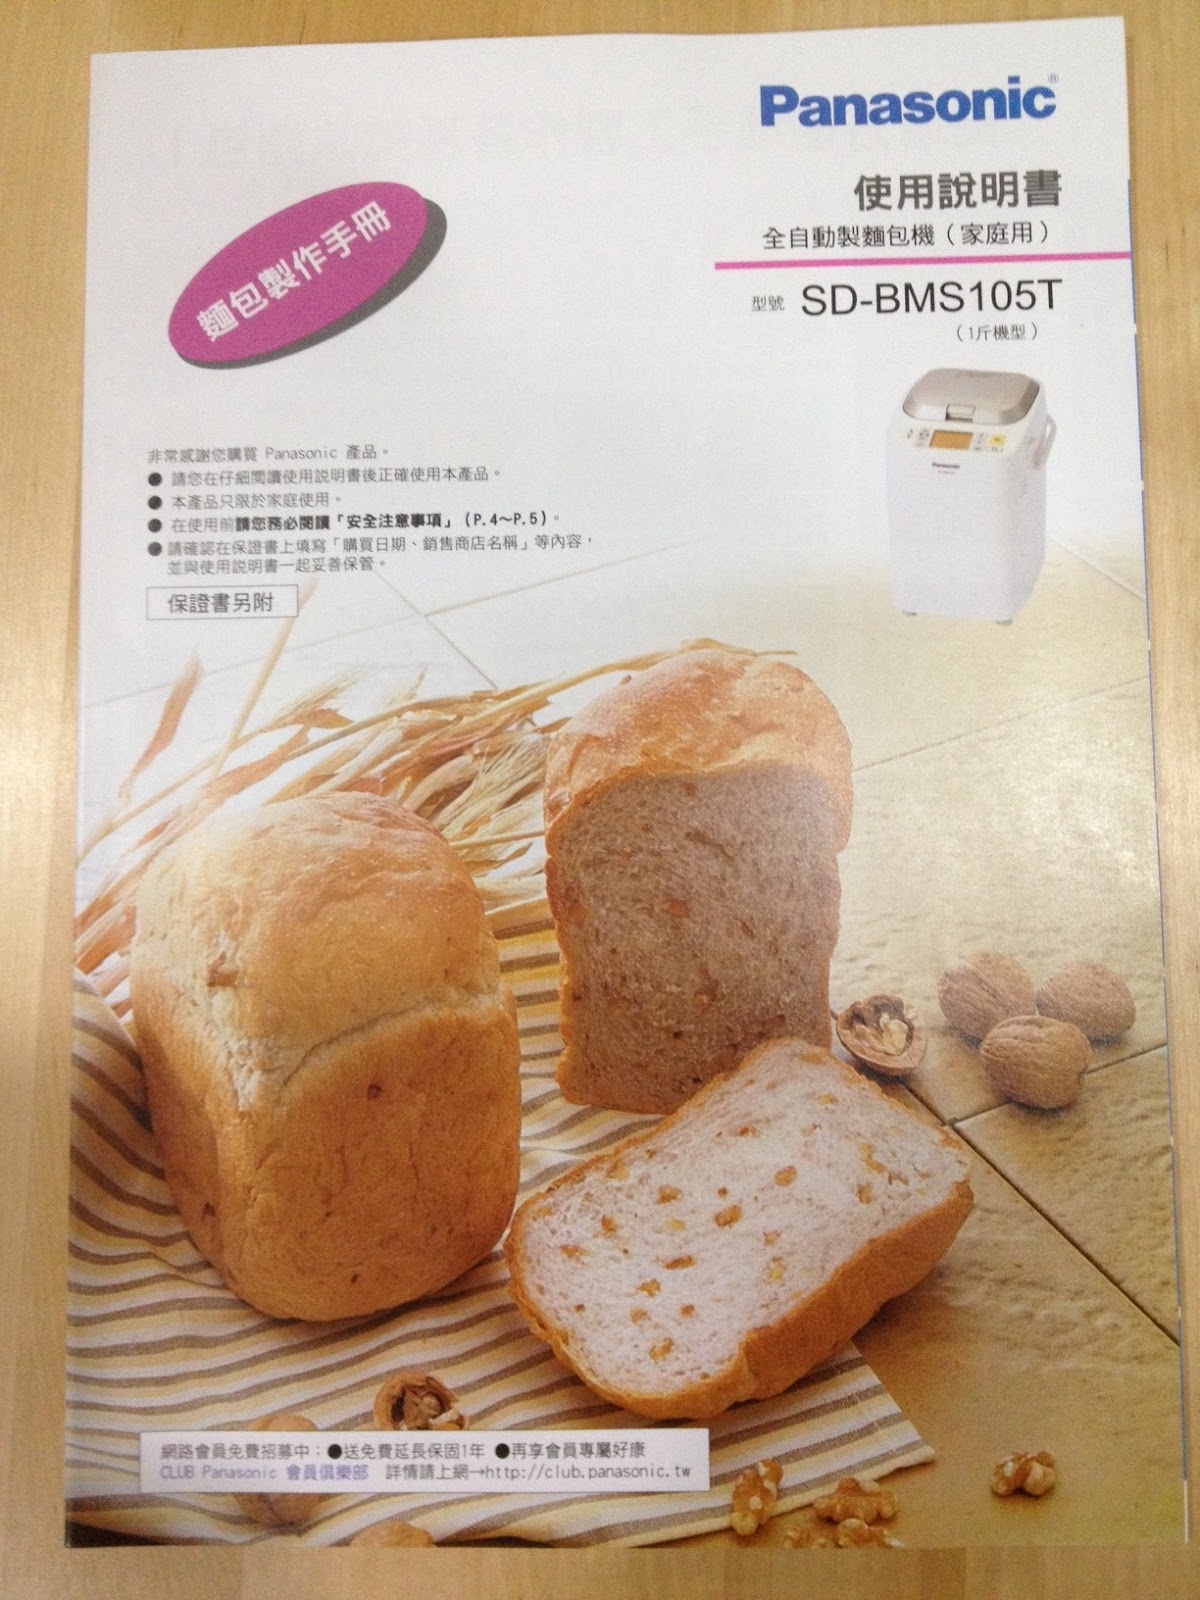
New bread maker. Panasonic SD-BMS105T
I bought a bread maker.
I know, I know, it's one of those top 10 items one should never purchase because it will inevitable end up in the attic or storage, collecting dust.
Why did I buy one?
It wasn't because of some fancy ad. It wasn't because I wanted to make preservative-free bread for my child. It wasn't even because I wanted the smell of freshly baked bread in the morning!
Why, then? I don't know. It was the devil at work.
I don't have an oven at home. Like most Taiwanese families my kitchen is tiny, and all I have is a toaster oven. Maybe this was partly why I wanted a bread machine. I thought instead of a conventional oven which wouldn't fit into my kitchen, I could make good use of a bread machine.
And of course, a friend just bought one and started to tell me how wonderful her bread maker was.
So this will be interesting, seeing how long I can keep using this machine!
Here's the whole story...
Recalling that my mother-in-law has an old bread machine lying in storage (hey! this should have clued me in! But it didn't...), I asked her if I could take a look at it to see if we can use it. She was very eager and helpful, telling me stories of how she used to make fresh bread for her children (Hint No.2!! Last time she used that machine was when husband was a CHILD, wow).
It's a nice looking machine! (Hint No. 3! Looks almost brand new!) Perfectly capable of making bread. I was confident I could bring the machine back to life (and use)! But, wait... where is the manual for this machine? I'm no cook, and definitely not AT ALL familiar with making bread. I need the operating manual for the machine! Of course the manual is nowhere to be found.
Google!
After 3 days of searching and internet surfing, and joining strange memberships to sites that promise locating operating manuals for all machinery -- NO LUCK! How can this be? How old is this machine?
On the third day I tracked down the company that imports and sells this brand of bread machines in Taiwan. Gave them a call to find out if they would have the manual by some miracle. What I found was, of course, that the bread maker I have is so old that they've now stopped manufacturing it, and that they do not have a copy of the operating manual.
<BTW, this is the MK Seiko HB-520 bread and dough maker. If anyone has the manual, please give me a copy!>
The people at Seiko suggested that I could consider trading in my old machine for their newest model! Obviously I would have to pay the difference, after they have evaluated the current value of my old machine. Hey! Not a bad idea at all, I thought.
So there I was, researching bread makers. The MK seiko HB-150 (their newest model) is truly splendid. But so is its price! Even with the trade in, I figure I would be paying more for this machine than the best models of other brands.
More googling, more online reading....Basically every waking moment not spent with my child or working, I was looking at bread makers.
I finally decided on the Panasonic SD-BMS105T bread maker. It is currently the newest model of Panasonic bread makers sold in Taiwan, and it is often compared with the MK seiko. Price of the Panasonic was also much more acceptable to me. (Considering this machine could possible go into storage by the end of the month, bwahahaha)
After another day of purchasing and acquiring the necessary ingredients for making my first loaf of bread, I was more than eager to begin!
And LOOK! An owner's manual complete with recipes! I decided to try my hands on the most basic bread.
Recipe called for
250g Bread flour or high gluten flour
15 g Butter
17 g Sugar
6g Whole milk powder
5 g Salt
190ml Water
2.8g Dry yeast
The manual also suggested that chilled water be used and decreasing the amount of water by 10ml if the machine is being operated in warm weather (room temp over 25C).
This looked pretty good. Not as nice as some of the breads made by other bloggers, but for my first attempt, I was satisfied.
But hey!!! What happened?? I sliced the bread and found a huge air pocket! That's not what other people got!
The bread tasted okay. But I was still puzzled over the huge air pocket.
More bread making to come!!!
I know, I know, it's one of those top 10 items one should never purchase because it will inevitable end up in the attic or storage, collecting dust.
Why did I buy one?
It wasn't because of some fancy ad. It wasn't because I wanted to make preservative-free bread for my child. It wasn't even because I wanted the smell of freshly baked bread in the morning!
Why, then? I don't know. It was the devil at work.
I don't have an oven at home. Like most Taiwanese families my kitchen is tiny, and all I have is a toaster oven. Maybe this was partly why I wanted a bread machine. I thought instead of a conventional oven which wouldn't fit into my kitchen, I could make good use of a bread machine.
And of course, a friend just bought one and started to tell me how wonderful her bread maker was.
So this will be interesting, seeing how long I can keep using this machine!
Here's the whole story...
Recalling that my mother-in-law has an old bread machine lying in storage (hey! this should have clued me in! But it didn't...), I asked her if I could take a look at it to see if we can use it. She was very eager and helpful, telling me stories of how she used to make fresh bread for her children (Hint No.2!! Last time she used that machine was when husband was a CHILD, wow).
It's a nice looking machine! (Hint No. 3! Looks almost brand new!) Perfectly capable of making bread. I was confident I could bring the machine back to life (and use)! But, wait... where is the manual for this machine? I'm no cook, and definitely not AT ALL familiar with making bread. I need the operating manual for the machine! Of course the manual is nowhere to be found.
Google!
After 3 days of searching and internet surfing, and joining strange memberships to sites that promise locating operating manuals for all machinery -- NO LUCK! How can this be? How old is this machine?
On the third day I tracked down the company that imports and sells this brand of bread machines in Taiwan. Gave them a call to find out if they would have the manual by some miracle. What I found was, of course, that the bread maker I have is so old that they've now stopped manufacturing it, and that they do not have a copy of the operating manual.
<BTW, this is the MK Seiko HB-520 bread and dough maker. If anyone has the manual, please give me a copy!>
The people at Seiko suggested that I could consider trading in my old machine for their newest model! Obviously I would have to pay the difference, after they have evaluated the current value of my old machine. Hey! Not a bad idea at all, I thought.
So there I was, researching bread makers. The MK seiko HB-150 (their newest model) is truly splendid. But so is its price! Even with the trade in, I figure I would be paying more for this machine than the best models of other brands.
More googling, more online reading....Basically every waking moment not spent with my child or working, I was looking at bread makers.
I finally decided on the Panasonic SD-BMS105T bread maker. It is currently the newest model of Panasonic bread makers sold in Taiwan, and it is often compared with the MK seiko. Price of the Panasonic was also much more acceptable to me. (Considering this machine could possible go into storage by the end of the month, bwahahaha)
After another day of purchasing and acquiring the necessary ingredients for making my first loaf of bread, I was more than eager to begin!
And LOOK! An owner's manual complete with recipes! I decided to try my hands on the most basic bread.
Recipe called for
250g Bread flour or high gluten flour
15 g Butter
17 g Sugar
6g Whole milk powder
5 g Salt
190ml Water
2.8g Dry yeast
The manual also suggested that chilled water be used and decreasing the amount of water by 10ml if the machine is being operated in warm weather (room temp over 25C).
This looked pretty good. Not as nice as some of the breads made by other bloggers, but for my first attempt, I was satisfied.
But hey!!! What happened?? I sliced the bread and found a huge air pocket! That's not what other people got!
The bread tasted okay. But I was still puzzled over the huge air pocket.
More bread making to come!!!
Tuesday, May 21, 2013
Cold noodles - Part 1
It's that time of the year again. Cold noodles!! When the weather starts to get warm, I crave cold noodles. I don't know the origins of the dish, but I assume the Taiwanese version is an adaptation from somewhere.
The interesting thing about cold noodles is that every vendor has a different take on the taste. As a result, almost everyone has their own favourite place for cold noodles. Of course, I have mine, but it's always so much fun to try other people's favourites.
And once in a while, I'm tempted to try new places.
Today is one of those days. It always feels like taking a huge leap of faith trying new cold noodles, because I already know what I like, what I want. But there's always the faintest hope of finding a new favourite place!!
I walked past this vendor last week, but at the time I was afraid of disappointment. Today my craving won over.
In goes the sauce. Notice how there's no clump of sesame paste on top. This is a good sign. I don't like it when the sesame paste separates from the rest of the sauce. Or worse, when the sesame paste is served separately!
Even coating of the noodles!! Sometimes this is not possible, if the sauce is too thick, or if there is a disproportionate amount of sauce to noodle. Also, this doesn't appear to be too oily. This is a dish for summer, so the lighter the better!
Now for the actual taste!
Surprisingly good! Yes, I was pleasantly surprised! All the flavours were nicely balanced. Not too salty, not too sweet, and just the right amount of sesame paste! The consistency of the sauce was good too. Once again, just thick enough to coat everything, and not too thick that you feel you are ingesting a mouthful of ground sesame.
Definitely returnable. I find myself wanting more. It's not my new favorite, but it is at least within my top 20s list.
The interesting thing about cold noodles is that every vendor has a different take on the taste. As a result, almost everyone has their own favourite place for cold noodles. Of course, I have mine, but it's always so much fun to try other people's favourites.
And once in a while, I'm tempted to try new places.
Today is one of those days. It always feels like taking a huge leap of faith trying new cold noodles, because I already know what I like, what I want. But there's always the faintest hope of finding a new favourite place!!
I walked past this vendor last week, but at the time I was afraid of disappointment. Today my craving won over.
From the appearance, I was not expecting much. Granted, most cold noodles are sold this way. It's the scarcity of cucumbers that disappoints me. Carrots are also not an "essential" element of cold noodles, in my opinion. The sauce, well, I couldn't tell much from the appearance alone.
This is just my habit, mixing the noodles and cucumbers/carrots before adding the sauce. Just breaking up the noodles and loosening everything makes the mixing later much easier. Plus I think the noodles are better at "absorbing" and "carrying" the sauce this way.
In goes the sauce. Notice how there's no clump of sesame paste on top. This is a good sign. I don't like it when the sesame paste separates from the rest of the sauce. Or worse, when the sesame paste is served separately!
Even coating of the noodles!! Sometimes this is not possible, if the sauce is too thick, or if there is a disproportionate amount of sauce to noodle. Also, this doesn't appear to be too oily. This is a dish for summer, so the lighter the better!
Now for the actual taste!
Surprisingly good! Yes, I was pleasantly surprised! All the flavours were nicely balanced. Not too salty, not too sweet, and just the right amount of sesame paste! The consistency of the sauce was good too. Once again, just thick enough to coat everything, and not too thick that you feel you are ingesting a mouthful of ground sesame.
Definitely returnable. I find myself wanting more. It's not my new favorite, but it is at least within my top 20s list.
Subscribe to:
Posts (Atom)